Luxury Everest Short Trek with Helicopter Tour
 in TripAdvisor
Recommended by 99% of travelers
in TripAdvisor
Recommended by 99% of travelers
AI Overview & Key Expedition Facts
Curated by Yeti Hikes Sherpa Intelligence
Overview Of Luxury Everest Short Trek with Helicopter Tour
- Region
- Everest Khumbu Region
- Destination
- Nepal
- Max Altitude
- 5,545 m/18,192 ft
- Activity
- Trekking in Nepal
- Duration
- 5 days
- Group Size
- 1-5
- Best Season
- Late Sep-Nov and Feb-May
- Accommodation
- 5-4 star Lodge/Tea House
- Meals
- Breakfast/Lunch/Dinner
- Transportation
- Flight/Helicopter
Highlights Of Luxury Everest Short Trek with Helicopter Tour
Enjoy the magnificent panorama of the Himalayas of Nepal: Mt.Pumori, Cho Oyu, Nuptse, Ama Dablam, Lobuche and the mesmerizing Mt.Everest.
Experience the aerial circuit view of the Khumbu region, the beautiful glaciers, icefalls, and Sherpa culture.
Have a gentle trek through the Sherpa villages like Phakding and Namche Bazaar and immerse into the cultural experience of Sherpa lifestyle, monasteries, and mountain hospitality.
A gentle hike to the famous Everest View Hotel for panoramic Himalayan views, a short yet rewarding trek that offers both cultural immersion and world class mountain scenery.
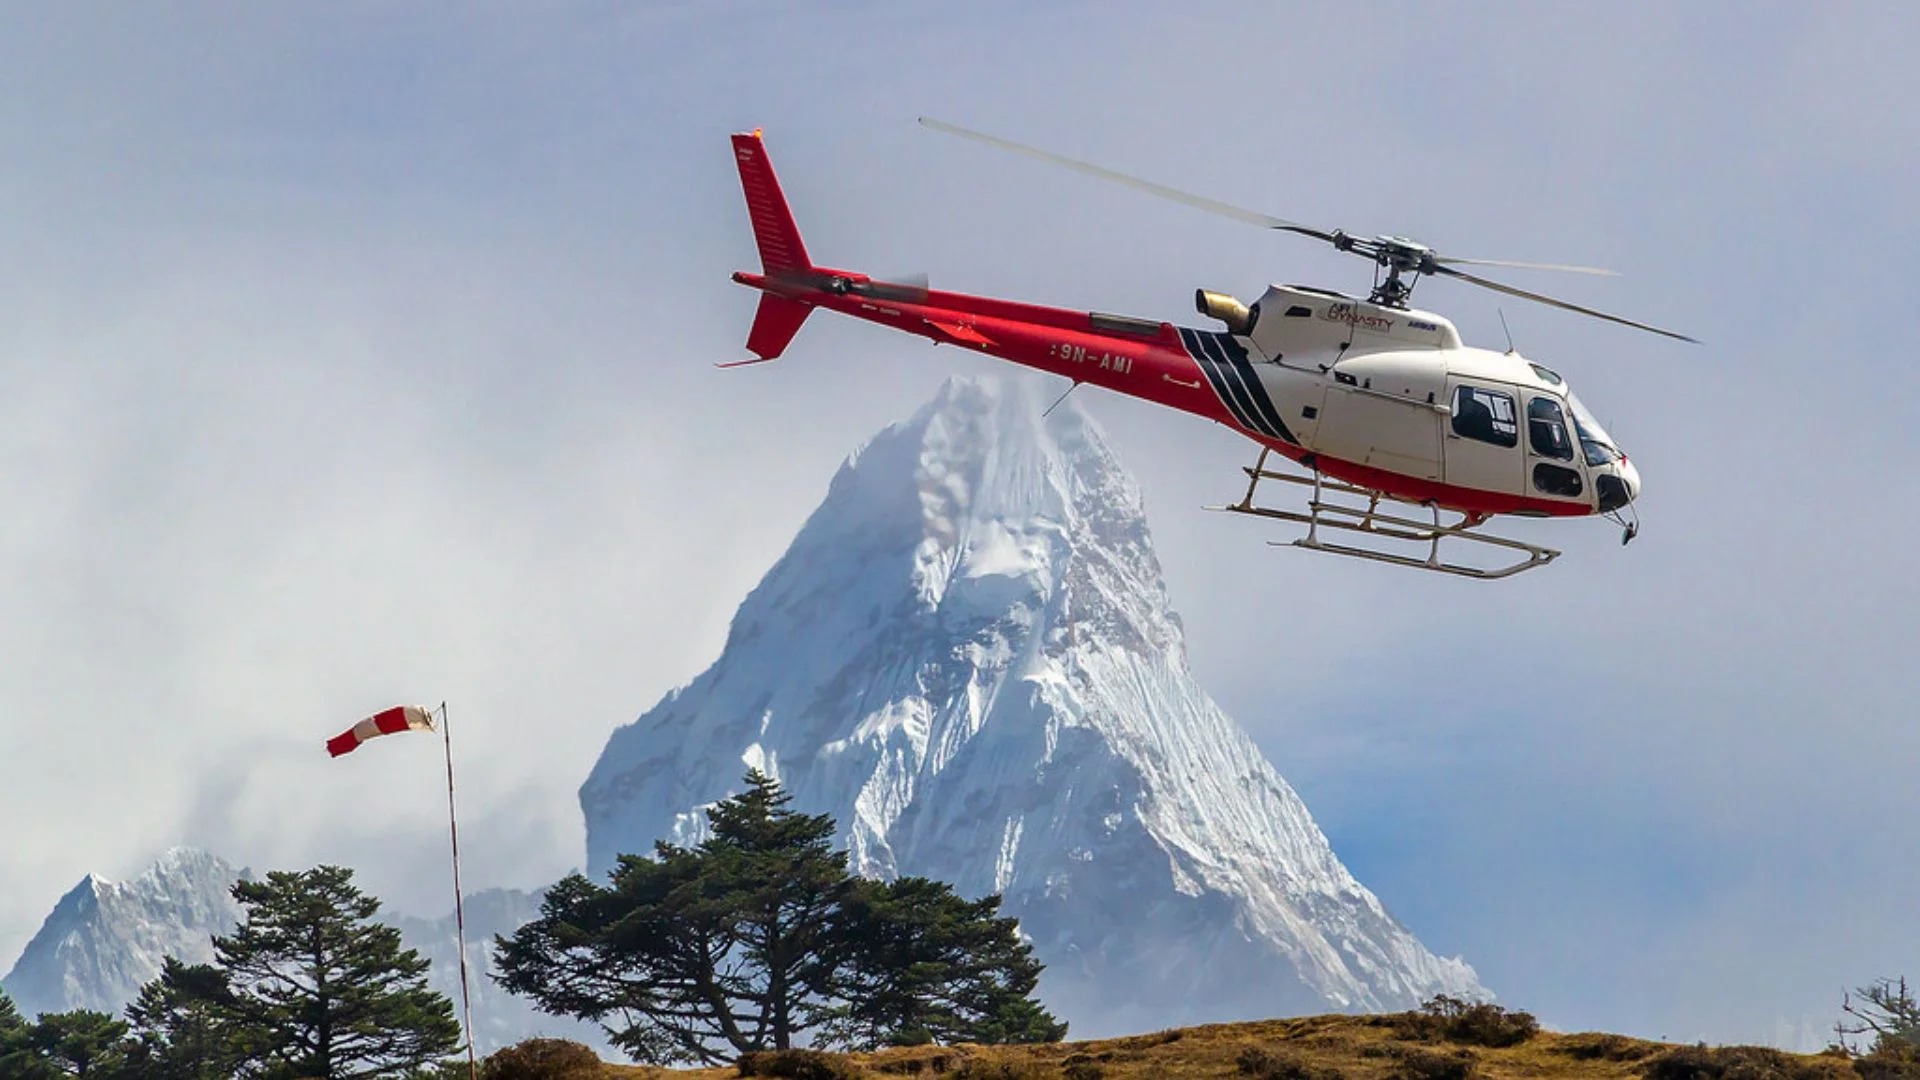
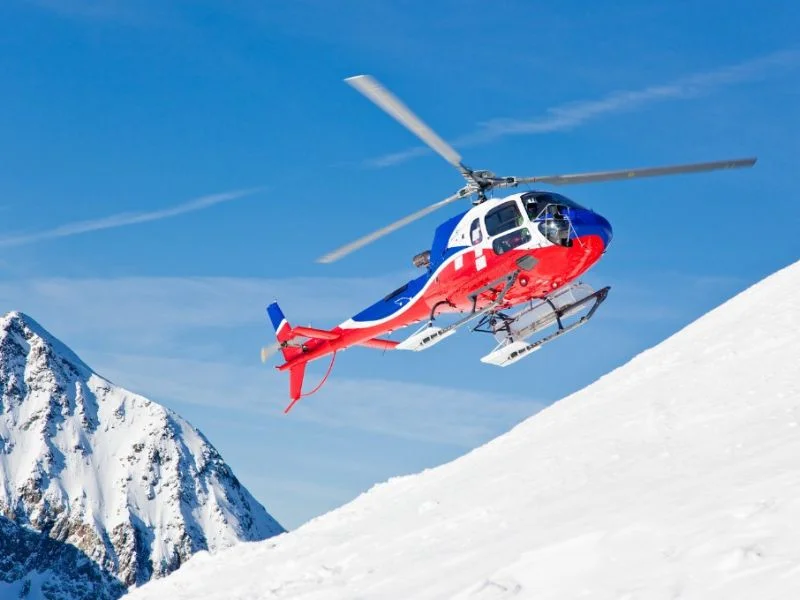
A thrilling adventure helicopter flight over the Everest Base Camp and Kala Patthar and a luxurious helicopter return from Lukla to Kathmandu.
Description Of Luxury Everest Short Trek with Helicopter Tour
Luxury Everest Short Trek with Helicopter Tour is a perfect helicopter ride to Everest Base Camp for trekkers with a limited time to explore the Everest region. It is a combination of short EBC hiking and a wonderful Everest Helicopter Tour. It is a truly overwhelming adventure where you can experience the mesmerizing views of Mt. Everest(8,848.86m/29,031.7ft), Lhotse(8,516m/27,940ft), Nuptse(7,861m/25,791ft), Ama Dablam(6,812m/22,349ft), Pumori(7,161m/23,494ft), and many others.
The exclusively designed helicopter tour to Everest Base Camp is truly overwhelming, including a hike upwards to Namche Bazaar and Phakding. Further, you will take the flight to EBC and then an exciting stopover landing on Kalapatthar (5,644m/ 18,519 ft) for a refreshing break. Overall, it is a short yet rewarding journey to experience the Everest region in style and comfort.
Join Yeti Hikes for your trek to Luxury Short Trek with Helicopter Trek and get a sneak peek at the world's highest mountain. Be fully enculturated in Sherpa culture, stroll around villages, and catch amazing sunrise moments from the top of the world. Click numerous memorable and mind-blowing snaps capturing all sorts of nature's beauty for a lifetime remembrance.
Note: The helicopter tour is on a shared basis. If you prefer a private helicopter ride, the cost may vary depending on the number of travelers.
Altitude Distance Coverage of Luxury Everest Short Trek with Helicopter Tour
Day | From | To | Altitude (m) | Distance (km) | Time (hrs) | Elevation Gain (m) | Elevation Drop (m) |
1 | Kathmandu | Kathmandu | 1,400 | - | - | - | - |
2 | Kathmandu | Phakding | 2,610 | 8 | 3-4 | +200 | -940 |
3 | Phakding | Namche Bazaar | 3,440 | 10 | 5-6 | +830 | -0 |
4 | Namche Bazaar | Everest View Hotel | 3,880 | 4 (to Hotel) | 3-4 | +440 | -440 |
| Everest View Hotel | Everest Base Camp/Kala Patthar | 5,550 (Kala Patthar) | - | 1 (flight) | +1,670 | -1,670 |
| Everest Base Camp/Kala Patthar | Lukla | 2,860 | - | 0.5 (flight) | - | -2,690 |
5 | Lukla | Kathmandu | 1,400 | - | - | - | - |
Outline Itinerary of Luxury Everest Short Trek with Helicopter Tour
Day 1: Arrival in Kathmandu and transfer to hotel
Day 2: Flight from Kathmandu to Lukla then Trek to Phakding
Day 3: Trek to Namche Bazar
Day 4: Hike to Everest View Hotel and Flight to Everest Base Camp and Kalapatthar
Day 5: Flight from Lukla to Kathmandu
Itinerary Of Luxury Everest Short Trek with Helicopter Tour
The journey starts from the very point of arrival at Tribhuwan International Airport (TIA) in Kathmandu where you will be welcomed by our staff. Further, you will be transferred to the hotel nearby, which adequately takes 25 to 30 minutes. You will also meet our office representative who will brief you about the trek and preparation for the journey. With this, you will be there are no plans, and you have the remaining day for yourself. You can visit the nearby market and the local stores as well.
The flight from Kathmandu to Lukla, which takes approx. 30 mins, marks the second day of your trek and is also the starting point. After landing, you will meet the remaining crew and have some breakfast. Lukla was once a tiny village but is now destined for trekkers. Phakding is in a lower region than Lukla; therefore, you will experience many ups and downs while moving towards the north. Passing several giant yaks, stone stairs, terraced hillsides, and crossing Dudh Koshi River using a suspension bridge, you’ll finally reach this beautiful village, Phakding in almost 5 hours.
The overnight stay at Phakding leads to Namche Bazar in the morning. After breakfast, you will trek uphill through Monjo and Jorsale. You’ll further ascend through the famous Hillary suspension bridge. The way goes on as you walk through a beautiful pine forest, follow Dudh Koshi River and Everest National Park's entrance. You will go through river banks, suspension bridges, and beautiful lush forests of rhododendrons and pines. Following the stunning sight of Thamserku, Khumung Peak, Kongde Peak, and many more, You will have the first glance of Mount Everest, and heading towards the north, you will reach the Namche Bazar, 3440 m high, within 4 to 5 hours of walking; that will end on the third day of the trek.
Time passes without us knowing, and you're already on the fourth day of the trek. Early in the morning you'll hike to the famous Everest View Hotel for a panoramic view of Everest and surrounding peaks and enjoy lunch with a view of Mt. Everest, Mt. Lhotse, Mt. Nuptse, Mt. Ama Dablam, and others. Without any delay, you will get into a helicopter and fly to the EBC, but with a stopover at Kalapathhar for 10-15 minutes only. The day will soon be over when you have to fly back to Lukla by helicopter and spend your night at a lodge in Lukla.
The return trip to Kathmandu has finally arrived. You will take an early morning flight from Lukla to Katmandu, which takes approximately 30 minutes to an hour. We, YetiHikes, will drop you off at the hotel and bid you goodbye. You can then visit the nearby markets, local places, clubs, and restaurants with no further plans.
What's Included In Luxury Everest Short Trek with Helicopter Tour
Included
All airport pick up drop by private vehicle - for both international and domestic flights.
Welcome dinner in an authentic restaurant.
Twin/double sharing accommodation in BB in Kathmandu.
Guided sightseeing tours in Kathmandu with private vehicle.
Kathmandu to Pokhara to Kathmandu by tourist bus.
National Park entrance fee and Trekkers' Information Management System, TIMS card.
A highly experienced, helpful, knowledgeable, friendly, English-speaking, well-trained, Government-licensed guide. The price includes his salary, food, drinks, accommodation, transport, and insurance.
02 guests to 01 porter with their insurance, salary, food, accommodation, and equipment.
We provide an assistant guide, his salary, food, drinks, accommodation, transport, and insurance walking with a group to support where necessary as per the group size.
Accommodation in the mountain during the trekking period.
Three meals a day; breakfast, lunch and dinner and tea/coffee during the trekking.
Safe drinking water.
Flight from Kathmandu/Ramechhap to Lukla and return back.
Welcome dinner in an authentic restaurant.
First add kit box.
Yeti Hikes's sleeping bag, down jackets, T-shirt, cap, duffle bags, city and trekking route maps – if necessary.
Arrangement of emergency evacuation service (should have insurance for emergency evacuation and will be paid by your travel insurance company).
Oxymeter to check your pulse and oxygen saturation and heart rate-twice daily during the trek-a very useful way to check AMS symptoms. This helps to make sure that your trek is in the safest hands possible.
One-hour complimentary spa/massage in Kathmandu after the trek.
All the applicable government and local taxes as per the itinerary.
Excluded
The fees associated with your Nepal visa.
All international air fares to and from Kathmandu.
Lunch and supper in Kathmandu.
Insurance for helicopter evacuation, as well as personal travel and health insurance.
Extra nights of accommodation, lunch, and dinner in the city may be required in the event of an early arrival or late departure, as well as an early return from a mountain or trekking excursion for any reason, exceeding the specified itinerary timeframe. We are able to assist you in securing additional nights of lodging.
Your personal expenses, including laundry, baggage charges, phone calls, battery recharges, bar and beverage bills, boiled or bottle water, hot and cold showers and an additional attendant, are as follows.
The tips for the trekking personnel and drivers.
Additional expenses that arise as a result of flight delays, strikes, weather conditions, or any other event beyond our control.
Trek Map Of Luxury Everest Short Trek with Helicopter Tour
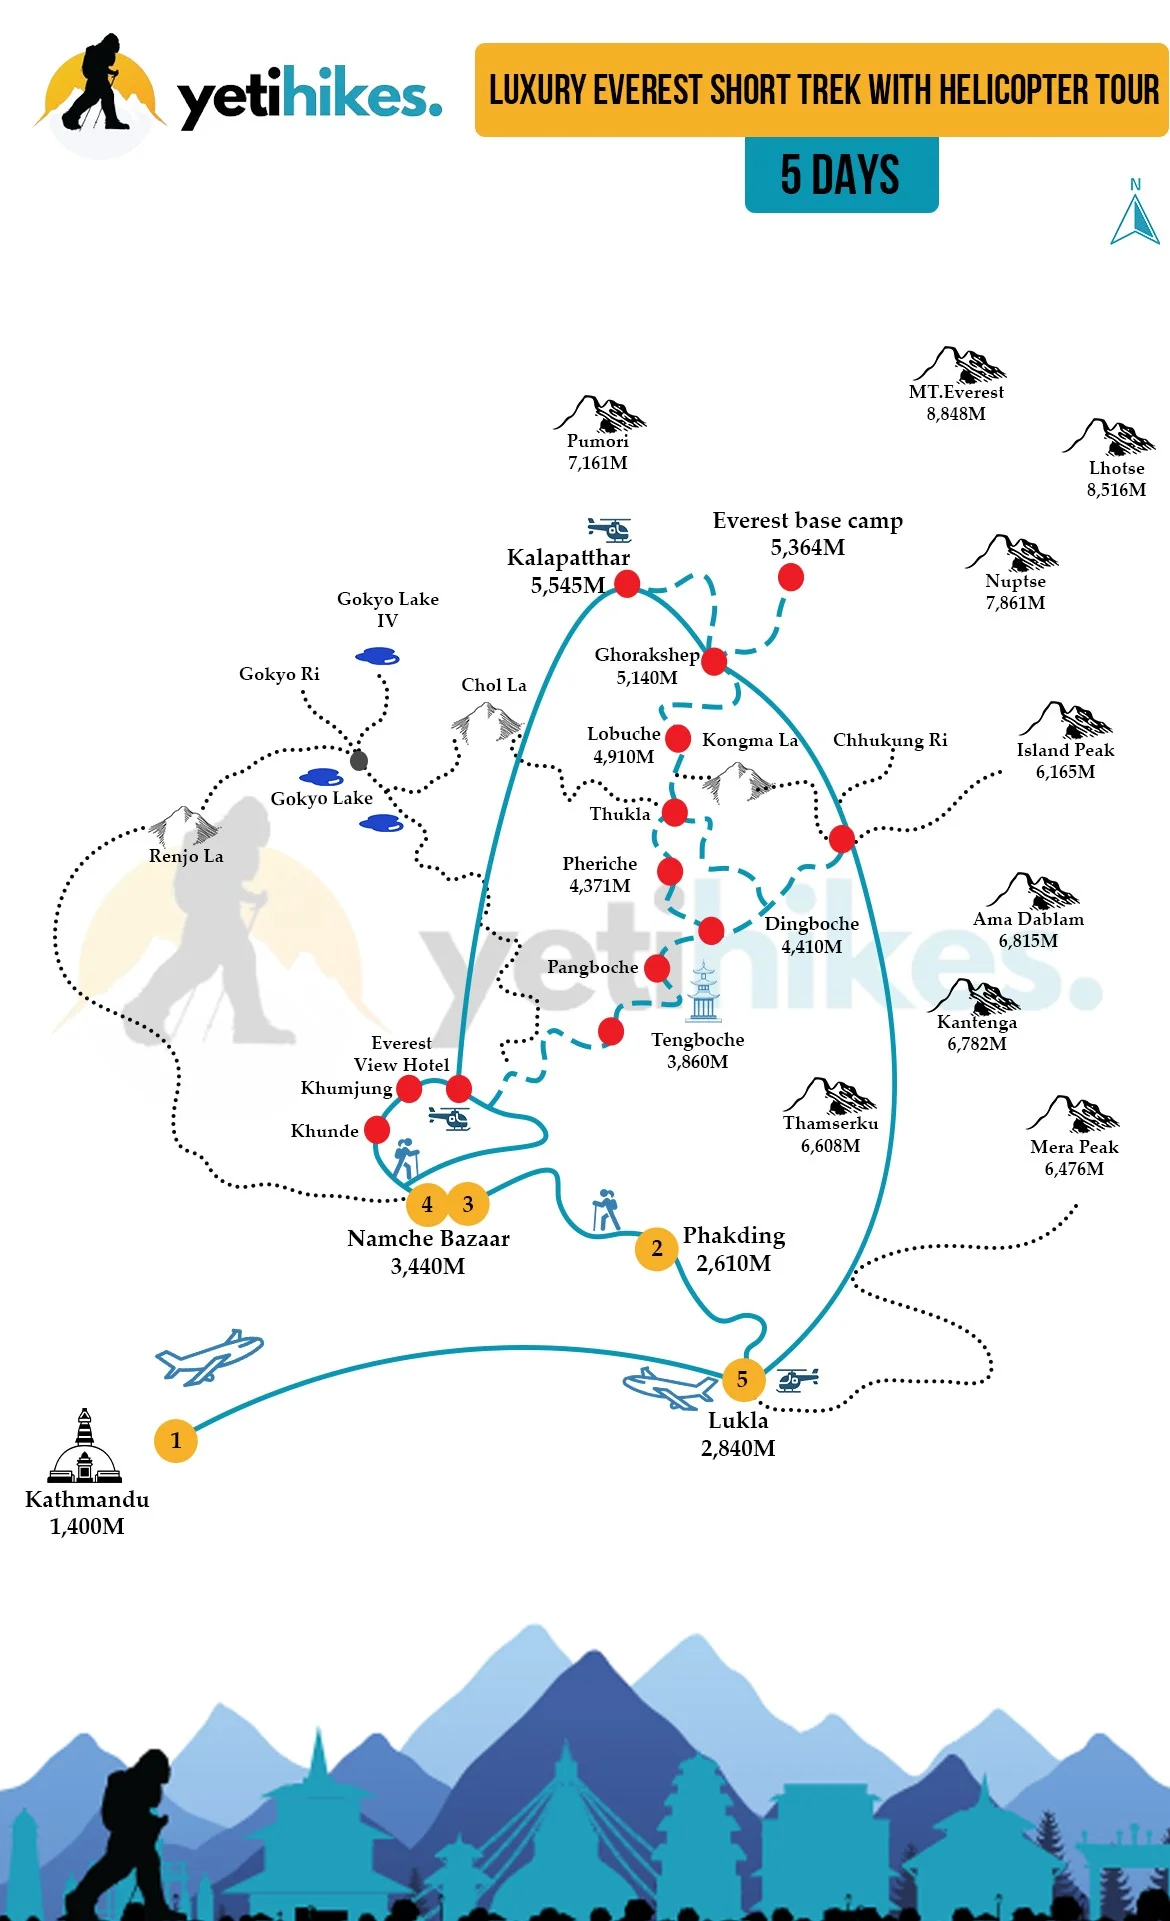
Altitude Chart Of Luxury Everest Short Trek with Helicopter Tour
Additional Information Of Luxury Everest Short Trek with Helicopter Tour
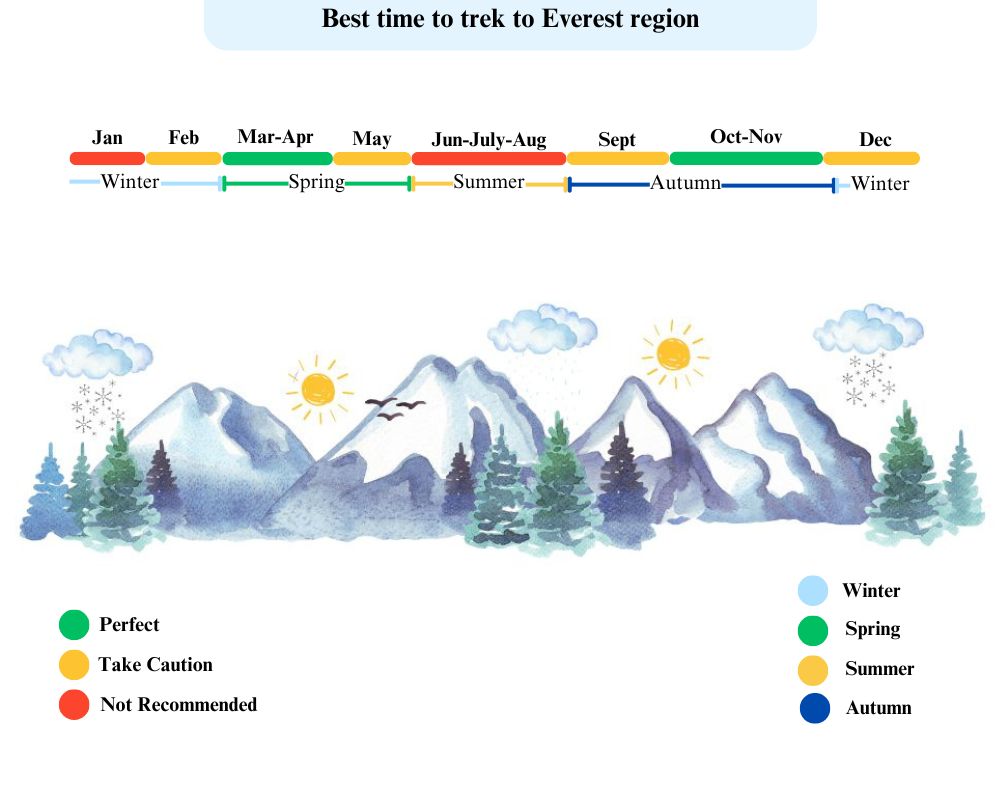
What is the best seasons for Luxury Everest Short Trek with Helicopter Tour?
Luxury Everest Short Trek with Helicopter Tour is an unbeatable adventure with ease and convenience of helicopter flights with the thrill of trekking. It is really vital to choose the right time to make the most of this fantastic journey. Below is a detailed guide on the best season for trekking in Nepal for such an adventure you can take part in to fully appreciate the awe-inspiring majesty of the Himalayas.
Spring (March to May)
Weather Conditions
Spring is generally considered the best time for the treks around the Everest region as it offers moderate temperatures and consistent weather patterns.Views and Landscapes
The already vibrant and picturesque environment becomes more alive with blossoming rhododendrons among other varieties of wildflowers in bloom.Visibility of Mt. Everest
Peaks of Himalayas, including the mighty Everest, appear visibly clear under clear blue skies.
Autumn (September to November)
Weather
The post-monsoon period has totally dry and stable conditions. Being an autumn season, it is not that cold in the mountains yet simultaneously being the ideal weather conditions for trekking. Being clear heavens, with crispy air, the panoramic view of snow-covered peaks is available.Festivals:
If you start trekking during this period, you may experience local festivals such as Tihar and Dashain-adding an additional cultural touch to your voyage.
Why Are These Seasons Chosen?
The spring and autumn is considered as the best season to travel Nepal because of its comfortable weather as well as maximum visibility of the mighty Himalayas.
Comfortable Temperatures
Spring and autumn avoid the heavy rains of the monsoon season and the extreme chill of winter; hence, comfortable trekking temperatures prevail.Maximum Visibility
The clear heavens during both seasons promise you those stellar views of Everest and other towering peaks.Less Crowded Although these are the major trekking seasons, by booking a luxury trek including a helicopter tour, you might not face such issues of crowded trails; hence, you can assure yourself of exclusivity.
Preparation for the Physical Fitness and Mental Stability for Luxury Everest Short Trek with Helicopter Tour
The Luxury Everest Short Trek with Helicopter Tour includes a trek to Phakding, Namche Bazaar and Everest View Hotel where physical fitness and mental stability of the key of full enjoyment. Running, cycling, and swimming will help in developing cardiovascular endurance aimed at orienting your body for high-altitude trekking. Besides, strength training of the lower body with practice hikes on varying terrain with a loaded backpack will help in your realistic preparation and equipping for the conditions.
Flexibility exercises, which involve yoga, enhance your balance and give you a better opportunity to avoid injuries; this would make your trek more enjoyable and not as strenuous. The other important variable, which actually brings success in every trek, is the mental stability of an individual. Some of the techniques for mental preparation include visualization, setting of realistic goals, resilience, and motivation. Management of stress through deep breathing, meditation, and mindfulness helps individuals stay focused and composed during the trek.
Also, remember that altitude acclimatization-maintaining gradual ascents-will prevent altitude sickness. Attitude will also play a big role, backed by relying on your trek group for support, and guides that shall enable you to embrace the challenges and wonders of this journey.
Gear List Of Luxury Everest Short Trek with Helicopter Tour
Clothing
Base Layers
Thermal tops and bottoms (for warmth at night).
Moisture-wicking t-shirts (2-3, quick-dry fabric).
Lightweight trekking pants (convertible into shorts if possible).
Insulating Layers
Fleece jacket or sweater.
Insulated down jacket (for colder nights and higher altitudes).
Outer Layers
Waterproof and windproof jacket.
Waterproof pants.
Hiking Socks
Wool or synthetic socks (3-4 pairs).
Liner socks (optional, to prevent blisters).
Accessories
Hat (for sun protection).
Beanie or warm hat (for higher altitudes).
Buff or scarf (to protect against wind and dust).
Gloves (both lightweight and insulated if possible).
Footwear
Hiking Boots
Sturdy, waterproof trekking boots (well-broken-in).
Camp Shoes
Lightweight sandals or camp shoes for resting in the evenings.
Backpacks
Daypack (20-30L)
For essentials like snacks, water, and rain gear.
Duffel Bag (if using porters)
You may need a duffel for the bulk of your gear if you’re hiring porters.
Trekking Gear
Trekking Poles
Helpful for balance and reducing stress on knees.
Sleeping Bag
Rated for temperatures below freezing (around -10°C/14°F).
Water Bottles
Reusable bottles or a hydration bladder (2-3 liters capacity).
Water Purification
Tablets, drops, or a portable filter to avoid purchasing bottled water.
Headlamp
With extra batteries (essential for early starts or evening walks).
Sunglasses
UV protection to safeguard against strong sunlight at altitude.
Trekking Map and Compass
Optional, but can help you follow along with the route.
Toiletries
Sunscreen (SPF 50+)
Lip Balm (with SPF)
Toilet Paper
Wet Wipes
Hand Sanitizer
Biodegradable Soap/Shampoo
Toothbrush and Toothpaste
First Aid & Medication
Personal Medication
Bring a sufficient supply of any prescribed medications.
Basic First Aid Kit
Painkillers, blister care (like moleskin), band-aids, and antiseptic cream.
Altitude Sickness Medication
Such as acetazolamide (consult your doctor before taking).
Snacks and Energy Foods
High-Energy Snacks
Protein bars, nuts, dried fruit, chocolate, or energy gels for extra fuel on the trail.
Electronics
Camera/Phone
For capturing memories.
Portable Charger/Power Bank
Charging points may be scarce and expensive.
Spare Batteries
Cold weather can drain batteries quickly.
Miscellaneous
Money
Carry enough cash for food, charging, and tips in remote areas.
Trekking Permits and Passport Copies
Ensure you have copies of your TIMS and ACAP permits, as well as your passport.
Small Locks
For your bags.
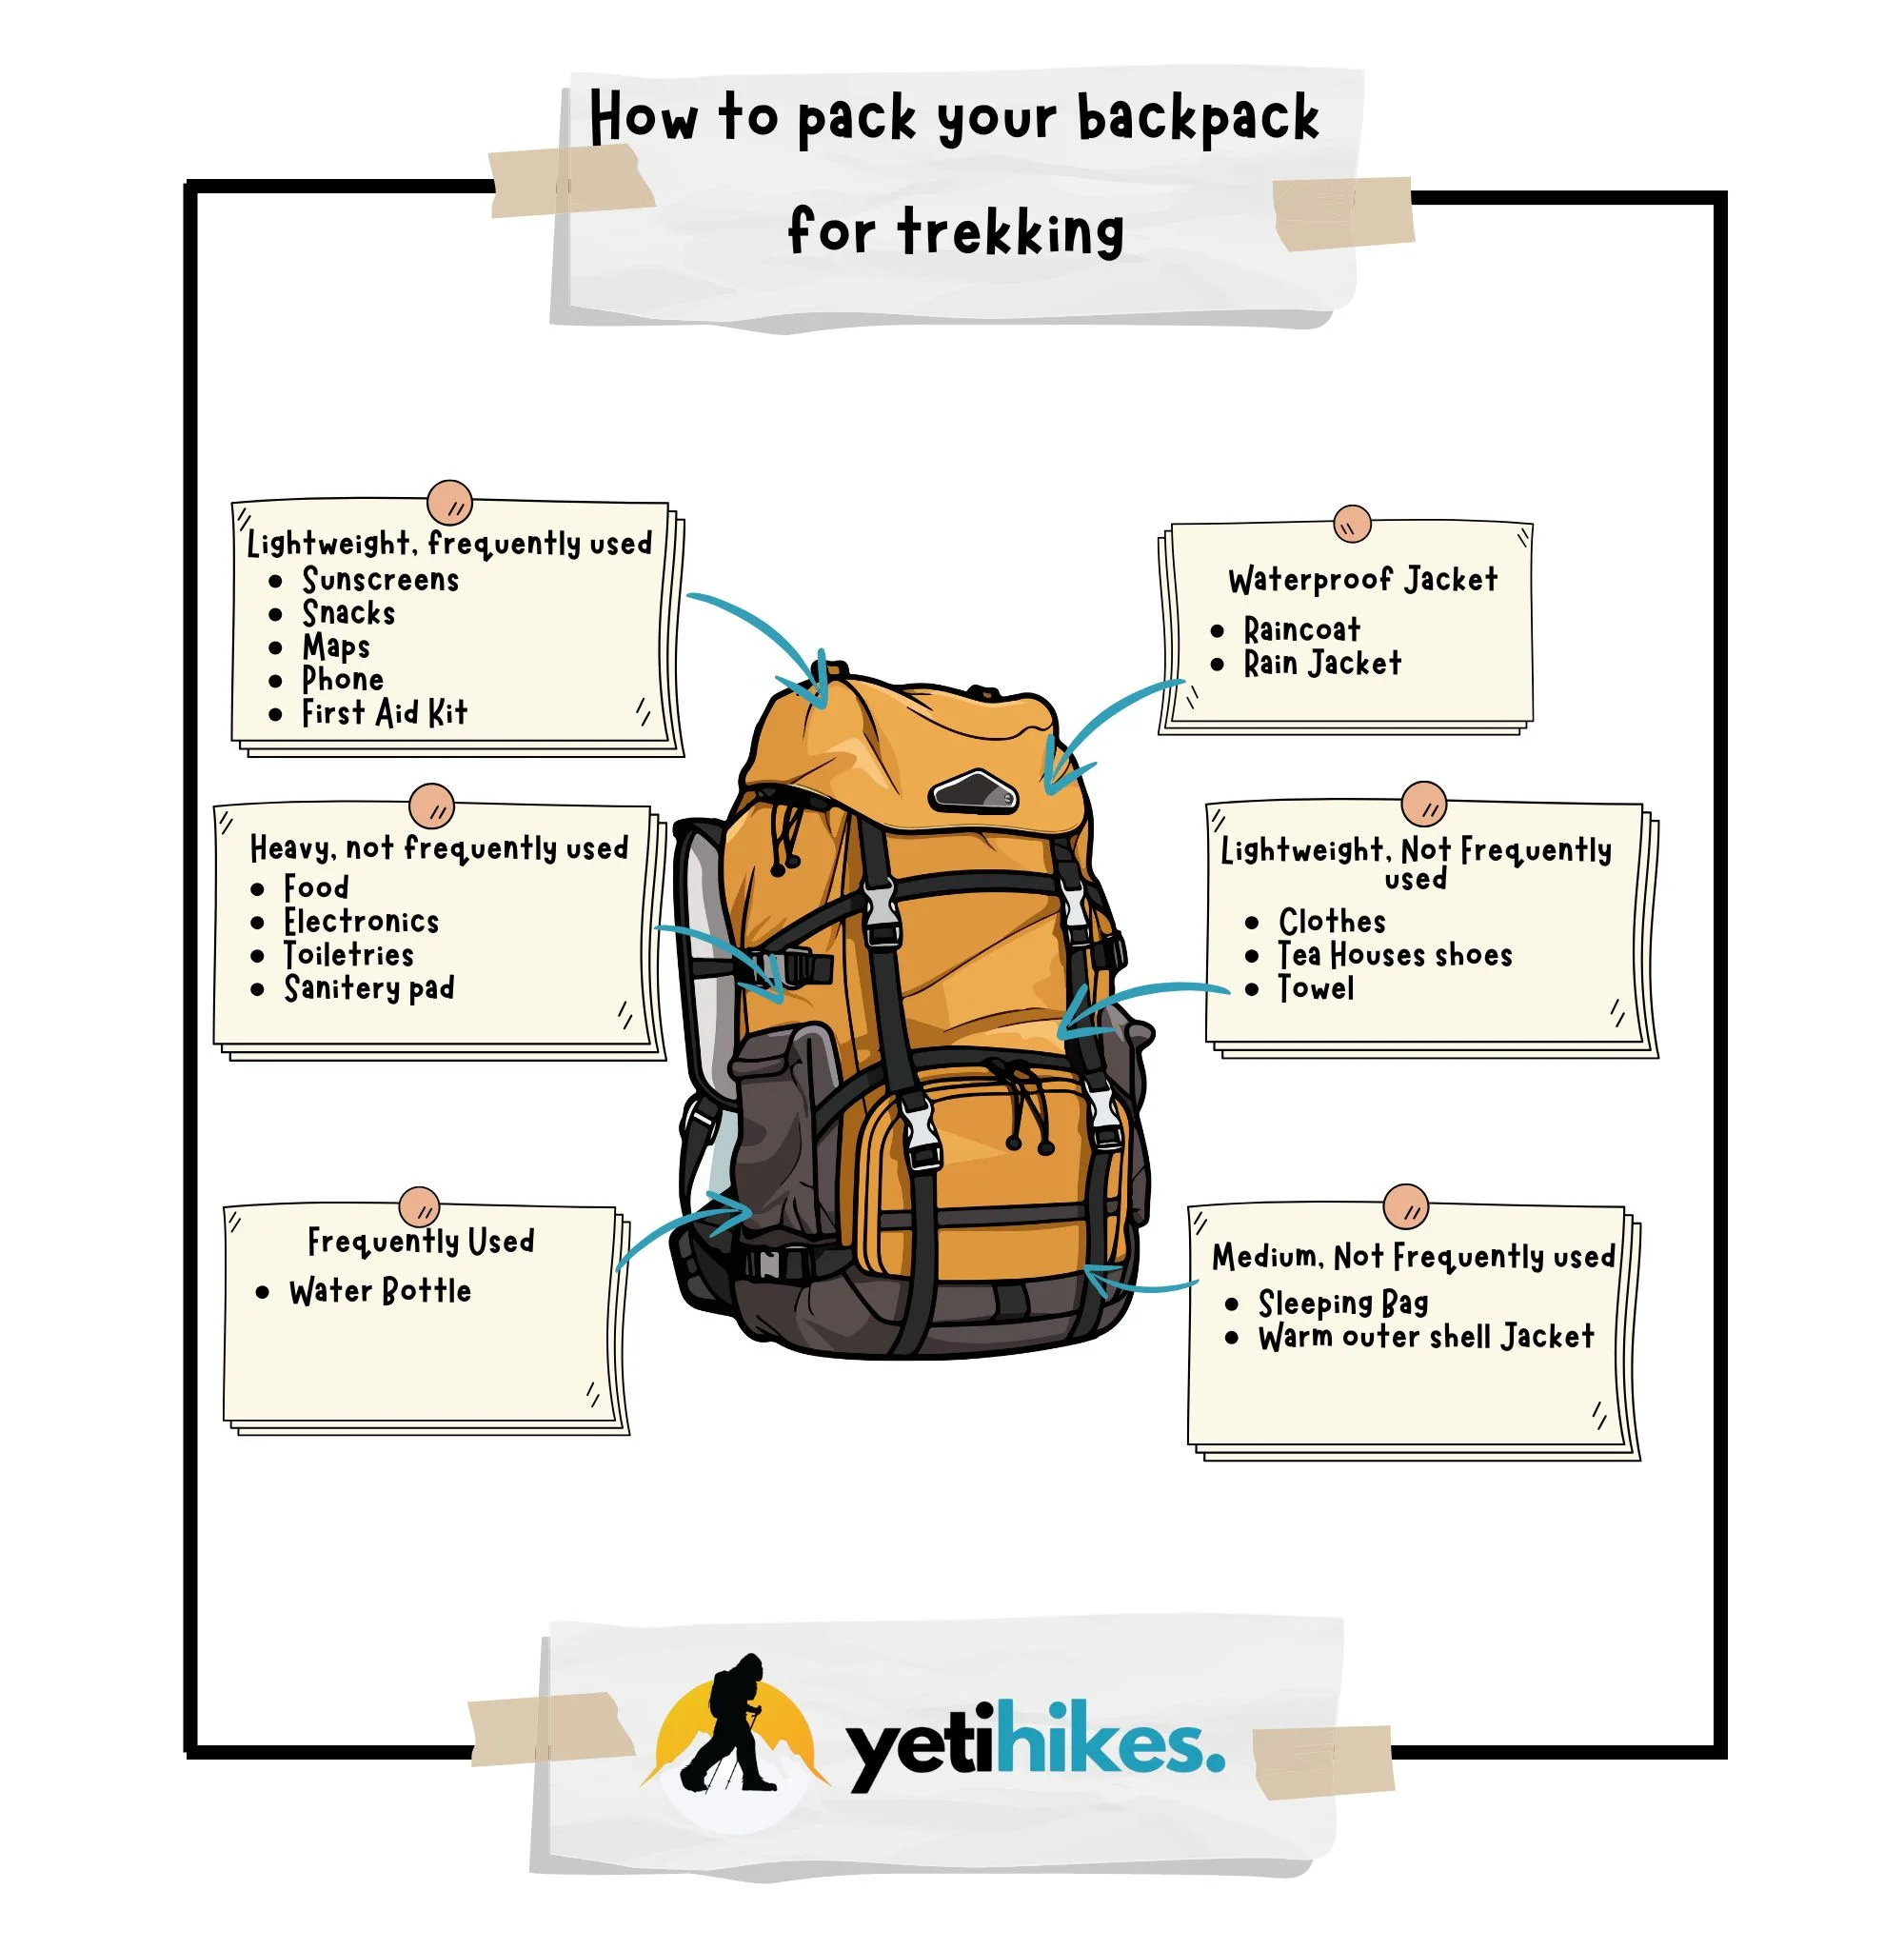
Backpack Packing & Gear Image
Media Gallery Of Luxury Everest Short Trek with Helicopter Tour
Recommended Blogs
The Essential Guide to Using Diamox for High Altitude Treks
Embarking on a high-altitude trek like Everest base camp trek is an exhilarating adventure, promising breathtaking views and unforgettable experiences. However, the stunning heights can also present a formidable challenge altitude sickness. This is where Diamox comes into play, serving as a vital ally for trekkers eager to conquer the mountains. In this essential guide, we’ll explore how Diamox works, its benefits, and tips for using it effectively to enhance your high-altitude journey. Whether you’re aiming for the towering peaks of Everest region or a picturesque mountain getaway, understanding Diamox can be the key to a smooth ascent. Join us as we delve into the intricacies of this medication, empowering you to embrace the heights with confidence and enjoy every moment of your wilderness adventure. Get ready to take that first step toward your lofty ambitions, armed with the knowledge you need to thrive at high altitudes. Understanding Altitude Sickness High-altitude trekking offers an unparalleled sense of achievement, but it comes with its own set of challenges, the most significant being altitude sickness. Altitude sickness, also known as acute mountain sickness (AMS), occurs when you ascend to a high elevation too quickly, disrupting your body's ability to acclimatize to the reduced oxygen levels. Symptoms of AMS can range from mild headaches and nausea to severe complications such as high altitude cerebral edema (HACE) and high altitude pulmonary edema (HAPE), both of which can be life-threatening if not treated promptly. Understanding the physiology behind altitude sickness is crucial for anyone planning a high-altitude trek. When you ascend to higher altitudes, the air pressure drops, leading to a decrease in the amount of oxygen available to your body. Your body needs time to adjust to this change, and if you climb too quickly, your body may not have sufficient time to acclimate, resulting in AMS. This condition can affect anyone, regardless of age, fitness level, or previous experience at high altitudes, making it an equal-opportunity adversary for all trekkers. Common symptoms of altitude sickness include headache, dizziness, fatigue, shortness of breath, loss of appetite, and difficulty sleeping. These symptoms can start to appear within hours of reaching a high altitude and can vary in severity. Recognizing these symptoms early and taking the necessary precautions can make a significant difference in your ability to have a safe and enjoyable trek. This is where Diamox, a well-known medication for preventing and treating altitude sickness, comes into play. What is Diamox and How Does It Work? Diamox is the brand name for acetazolamide, a medication primarily used to treat glaucoma, epilepsy, and altitude sickness. Originally developed for other medical conditions, it has become widely recognized for its effectiveness in preventing and mitigating the symptoms of altitude sickness. Diamox works by promoting faster and deeper breathing, which helps increase the amount of oxygen in your blood, thereby aiding in acclimatization to high altitudes. The way Diamox functions is quite fascinating. It is a diuretic and carbonic anhydrase inhibitor that triggers your kidneys to excrete bicarbonate, making your blood more acidic. This mild acidosis stimulates the respiratory center in your brain, encouraging you to breathe more deeply and frequently. As a result, your body can take in more oxygen, which is crucial at high altitudes where oxygen levels are lower. This increased respiration helps to counteract the hypoxic environment and supports better acclimatization. In addition to its respiratory benefits, Diamox also helps reduce the fluid buildup in the lungs and brain, which can be critical in preventing HAPE and HACE. By reducing the risk of these severe complications, Diamox can make high-altitude trekking safer and more manageable for adventurers. Understanding how Diamox works and its role in high-altitude acclimatization can empower you to make informed decisions about your trek and your health. Benefits of Using Diamox for High Altitude Treks One of the primary benefits of using Diamox for high-altitude treks is its ability to prevent and reduce the severity of altitude sickness. By facilitating better acclimatization, Diamox can help trekkers avoid the debilitating symptoms of AMS, allowing them to focus on the beauty and excitement of their journey. Trekkers who use Diamox often report fewer headaches, less nausea, and improved overall well-being, making their high-altitude experience more enjoyable. Another significant advantage of Diamox is its ability to enhance overall performance at high altitudes. By improving oxygenation and minimizing the risk of severe altitude-related illnesses, trekkers can maintain higher energy levels and endurance throughout their trek. This can be particularly beneficial for those attempting challenging routes or aiming to reach significant elevations, as it allows them to push their limits safely and confidently. Diamox also offers peace of mind for trekkers and their companions. Knowing that you have a reliable medication to help mitigate the effects of altitude sickness can reduce anxiety and stress, which can be particularly valuable in the demanding and unpredictable environment of high-altitude trekking. This mental reassurance, combined with the physical benefits of the medication, can make a substantial difference in the overall trekking experience. Recommended Dosage and Administration When it comes to using Diamox for high-altitude treks, following the recommended dosage and administration guidelines is crucial for maximizing its effectiveness and minimizing potential side effects. The typical dosage for preventing altitude sickness is 125 to 250 mg twice daily, starting one to two days before ascending to high altitudes. This dosage should be continued throughout the ascent and for at least two days after reaching the highest elevation. It's important to take Diamox with plenty of water to stay hydrated, as the medication has a diuretic effect that can increase urine output. Maintaining adequate hydration is essential to prevent dehydration, which can exacerbate the symptoms of altitude sickness and negatively impact your overall health. Additionally, taking Diamox with food can help minimize any gastrointestinal discomfort that may occur. Consulting with a healthcare professional before starting Diamox is highly recommended. They can provide personalized advice based on your health history, current medications, and specific trekking plans. Your healthcare provider may also suggest a test dose to check for any adverse reactions before committing to a full course of the medication. Following medical advice and adhering to the recommended dosage and administration guidelines can ensure that you use Diamox safely and effectively during your trek. Potential Side Effects and Precautions While Diamox is generally well-tolerated, it can cause some side effects, which trekkers should be aware of before starting the medication. Common side effects include tingling or numbness in the fingers, toes, or face, a metallic taste in the mouth, and increased urine output due to its diuretic properties. These side effects are usually mild and tend to diminish as your body adjusts to the medication. More serious side effects are rare but can occur. These may include allergic reactions, such as rash, itching, or swelling, particularly of the face, tongue, or throat, severe dizziness, difficulty breathing, and changes in vision. If you experience any of these severe side effects, it's crucial to seek medical attention immediately. Monitoring your body's response to Diamox and being aware of any unusual symptoms can help ensure your safety while using the medication. Certain precautions should be taken when using Diamox. Individuals with a history of sulfonamide allergy, liver or kidney disease, or severe dehydration should avoid using Diamox unless advised otherwise by a healthcare professional. Additionally, it's important to avoid alcohol and caffeine while taking Diamox, as they can exacerbate dehydration and interfere with the medication's effectiveness. By understanding the potential side effects and taking necessary precautions, you can use Diamox safely and effectively during your high-altitude trek. When to Start Taking Diamox Timing is crucial when it comes to taking Diamox for preventing altitude sickness. The general recommendation is to start the medication one to two days before beginning your ascent. This allows your body to begin acclimatizing to the medication and helps ensure that its effects are in full swing by the time you reach higher altitudes. Starting Diamox too late may reduce its effectiveness and increase the risk of developing altitude sickness. If you're planning a gradual ascent with ample time for acclimatization, you might consider starting Diamox a bit later, such as the day before reaching an elevation above 8,000 feet (approximately 2,400 meters). However, for rapid ascents or when trekking to particularly high altitudes quickly, starting the medication earlier is advisable. Consulting with a healthcare professional can provide personalized guidance on the best timing for your specific itinerary and health status. It's also important to continue taking Diamox for at least two days after reaching your highest elevation point and during your descent. This helps ensure that your body remains acclimated and reduces the risk of experiencing altitude sickness symptoms as you move between different elevations. Consistency in taking the medication as prescribed is key to maintaining its protective effects throughout your trek. Combining Diamox with Other Altitude Sickness Prevention Strategies While Diamox is a powerful tool for preventing altitude sickness, it works best when combined with other effective strategies. One of the most important strategies is to ascend gradually, allowing your body ample time to acclimatize. A common guideline is to avoid ascending more than 1,000 to 1,500 feet (300 to 450 meters) per day once you are above 10,000 feet (3,000 meters) and to take a rest day for every 3,000 feet (1,000 meters) you climb. Staying well-hydrated is another critical component of preventing altitude sickness. Drinking plenty of fluids helps maintain proper hydration levels and supports your body's acclimatization processes. Avoiding alcohol and caffeine is also advisable, as these substances can contribute to dehydration and exacerbate altitude sickness symptoms. Additionally, eating a balanced diet rich in carbohydrates can provide the necessary energy for your body to cope with the demands of high-altitude trekking. Other strategies include taking regular breaks during your ascent to avoid overexertion, sleeping at a lower altitude than the highest point reached during the day, and paying close attention to your body's signals. If you start experiencing symptoms of altitude sickness, it's crucial to take them seriously and consider descending to a lower altitude to allow your body to recover. Combining these strategies with the use of Diamox can significantly enhance your ability to prevent and manage altitude sickness, ensuring a safer and more enjoyable trekking experience. Personal Experiences: Testimonials from Trekkers Real-life experiences from fellow trekkers can provide valuable insights into the use of Diamox and its effectiveness in preventing altitude sickness. Many trekkers who have used Diamox report positive experiences, highlighting its role in making their high-altitude adventures more manageable and enjoyable. For instance, Sarah, an avid trekker who completed the Everest Base Camp trek, shared that Diamox helped her avoid severe altitude sickness symptoms, allowing her to fully appreciate the breathtaking landscapes without the constant worry of feeling unwell. John, another seasoned trekker who conquered the Inca Trail in Peru, emphasized the importance of combining Diamox with gradual acclimatization and proper hydration. He noted that while Diamox played a crucial role in preventing headaches and nausea, adhering to a slow ascent and staying well-hydrated were equally important in ensuring a successful trek. John's experience underscores the importance of a holistic approach to altitude sickness prevention. Emily, a first-time high-altitude trekker who embarked on a journey to Kilimanjaro, found Diamox to be a game-changer. Despite initial apprehensions about potential side effects, Emily decided to use Diamox after consulting with her healthcare provider. She reported minimal side effects and credited Diamox with helping her reach the summit without experiencing significant altitude sickness symptoms. Emily's testimonial highlights the value of personalized medical advice and the positive impact Diamox can have on high-altitude trekking experiences. Frequently Asked Questions About Diamox Q: Can I take Diamox if I have a sulfa allergy? A: Diamox is a sulfonamide medication, so individuals with a sulfa allergy should exercise caution. It's essential to consult with a healthcare professional before taking Diamox if you have a known sulfa allergy. They can provide guidance on alternative medications or strategies for preventing altitude sickness. Q: How long does it take for Diamox to start working? A: Diamox typically starts working within a few hours of ingestion. However, for optimal effectiveness in preventing altitude sickness, it is recommended to start taking the medication one to two days before beginning your ascent. This allows your body to adjust to the medication and ensures its protective effects are in place as you reach higher altitudes. Q: Can I stop taking Diamox once I feel acclimatized? A: It's generally advised to continue taking Diamox for the duration of your ascent and for at least two days after reaching your highest elevation. Stopping the medication prematurely may increase the risk of developing altitude sickness. Always consult with a healthcare professional before making any changes to your medication regimen. Q: Are there any natural alternatives to Diamox for preventing altitude sickness? A: While Diamox is a proven and effective medication for preventing altitude sickness, some natural alternatives may help support acclimatization. These include gradual ascent, staying well-hydrated, eating a high-carbohydrate diet, and taking regular rest days. Herbal supplements like ginkgo biloba have been suggested to aid in acclimatization, but their effectiveness is less well-documented compared to Diamox. Always consult with a healthcare professional before trying any new supplements or strategies. Q: Can I drink alcohol while taking Diamox? A: It is generally advised to avoid alcohol while taking Diamox, as alcohol can exacerbate dehydration and interfere with the medication's effectiveness. Additionally, alcohol can amplify the side effects of Diamox, such as dizziness and drowsiness, which can be particularly dangerous in a high-altitude environment. Conclusion: Preparing for a Successful High Altitude Adventure Embarking on a high-altitude trek is an adventure that promises awe-inspiring landscapes and a profound sense of accomplishment. However, the challenges posed by altitude sickness can be a significant hurdle for many trekkers. Understanding and effectively using Diamox can be a game-changer, allowing you to focus on the beauty and excitement of your journey rather than the discomfort of altitude sickness. In this comprehensive guide, we have explored the intricacies of altitude sickness, the mechanism of action of Diamox, its benefits, recommended dosage, potential side effects, and the importance of combining it with other preventive strategies. Personal testimonials and frequently asked questions have provided additional insights and practical advice for using Diamox effectively. As you prepare for your high-altitude adventure, remember that knowledge and preparation are your best allies. Consult with a healthcare professional to tailor a prevention plan that suits your individual needs, and equip yourself with the right strategies and medications to ensure a safe and enjoyable trek. With the right approach, you can conquer the heights with confidence, embracing the thrill of the climb and the majesty of the mountains. Happy trekking!
Navigating Drone Regulations and Responsible Flying in Nepal
Flying Drones are popular in Nepal to capture Nepal’s stunning landscapes, cultural landmarks and the majestic Himalayan peaks. They are used to document the natural beauty of Nepal from a unique aerial perspective. It requires technical skill but the operators need to be aware about the local laws and regulations of flying drones in Nepal. These rules must be followed to protect the local citizens, their property and failing to do so may result in fines and other legal issues. This blog is for both the local residents and foreign visitors to understand the regulations of drone flying. With this you can stay safe, capture incredible footage and respect the local rules. Drone Regulations in Nepal For a safe and legal use of drones, everyone must follow the set of rules by the Civil Aviation Authority of Nepal (CAAN). In Nepal, CAAN is the official body to manage and regulate drone operations safely. All drones must be registered with CAAN and comply with the various regulations of weight restrictions and altitude limits. The drone must be within the operator;s visual line of sight and must avoid restricted zones such as airports, military areas and certain cultural and wildlife areas. These rules help to preserve Nepal’s natural beauty and cultural heritage as well as prevent accidents with other aircraft. Drone Registration and Permits for Flying After all the drones are registered under CAAN, it will receive a unique identification number to track and manage drone operations across the country. The drone permit requirements depend on the drone’s weight and intended use. Drones Under 2 kg (4.5 lbs) They do not require formal authorization if you’re flying on private property and below 200 ft. However, you must still follow the local guidelines and avoid no-fly zones. Drones over 2 kg (4.5 lbs) They require formal authorization and it is required if you’re flying over 400 ft or for any commercial use. Issuing Authorities: CAAN Department of Tourism Ministry of Home Affairs Required Documents for the permits: Passport Visa Flight plan A letter of commitment Special Permits for Restricted Areas For the restricted areas like airports, military zones, cultural heritage sites or certain wildlife zones, you may require additional permissions regardless of the weight of the drone. Operational Guidelines and Limits To operate drones in Nepal, you (operator) must follow specific operational limits to ensure safety. Drones should not fly higher than 120 meters (394 feet). Operators must maintain a horizontal distance of not more than 500 meters (1,640 feet). The drones must be within visual line of sight. The operators must be able to see the drone with their own eyes without using binoculars or cameras. The drone flight must be conducted in broad daylight and during clear weather conditions. Documentation for Foreign Operators Aside from the CAAN registration, foreign drone operators must complete a temporary drone registration by the Flight Safety Standard Department (FSSD) in Kathmandu. This is required to officially authorize the drone for flight in Nepal. For further assistance, you can contact CAAN directly: Address: Sinamangal Rd, Kathmandu 44600Email Address: [email protected] No-Fly Zones and Restrictions The certain areas in Nepal have strictly off limits for zones, or no-fly zones to ensure safety, security and the protection of certain zones. The location includes airports, airfields, military areas, and government buildings. The operators must avoid crowded areas and public events to prevent any accidents and privacy compliance. The national parks, heritage sites, and religious areas require special permission before flying a drone. Consequences of Non-Compliance If you fail to follow the rules and regulations related to drone flying, you will face some serious consequences. You may face fines ranging from NPR 2,000 to NPR 5,000, confiscation of your drones and even legal actions. You can also endanger the local citizens, wildlife, and property. You need to understand and respect the laws, enjoy the drone activities and stay within the law. Prevent accidents and promote responsible drone flying! Equipment Tips You need to carry the right equipment for effective drone operation. Bring your power banks, extra batteries, and protective cases. Carry a lightweight drone with long battery life. Carry a drone with stable GPS performance which is suitable for Himalayan treks. Best Locations for Drone Photography inside Kathmandu Valley You can capture the complex architecture and lively city life from unique aerial perspectives at iconic locations like Patan Durbar Square during Patan city tour, Bhaktapur Durbar Square during Bhaktapur city tour, and Swayambhunath Stupa during Kathmandu city tour. It is challenging to fully appreciate the centuries-old temples, palaces, and traditional Newari streets that are on display in these places from the ground up. Pashupatinath Temple, the Garden of Dreams, and the surrounding hills offer breathtaking contrasts of greenery, rivers, and urban settlements for nature and landscape photography. To respect cultural sensitivities while taking stunning footage, you must make sure that you abide by local drone laws and stay away from restricted areas close to places of worship or busy places. Drone Photography in the trekking region The trekking areas of Nepal provide some of the most breathtaking drone photography opportunities. Due to the dramatic landscapes created by the Himalayan peaks, deep valleys, and isolated villages, the amazing treks include Manaslu Circuit, Upper Mustang, Kanchenjunga Base Camp, and Ghorepani Poon Hill, in addition to well-known routes like Everest Base Camp, Annapurna Circuit, Langtang Valley, and Makalu Base Camp. From the lush forests of Langtang and Annapurna to the arid landscapes of Upper Mustang, every trek offers a different view. Conclusion: Fly Responsibly Flying drones in Nepal offer beautiful responsibilities to capture the stunning landscape, cultural heritage and Himalayan vistas. However, you must follow the local laws, obtain necessary permits and respect the no-fly zones. You should safely explore Nepal and preserve its natural beauty and cultural integrity. Carry the right equipment and plan for a smooth and enjoyable experience!
Helicopter tour rules in Nepal
A helicopter tour is an excellent and adventurous opportunity to witness the Himalayan scenery with beautiful glacial lakes and sacred pilgrimage destinations shrouded in mist. All within just a couple of hours, the scenic helicopter flight has become a great substitution to long trekking journeys. Around the base of Mount Everest, to a landing site near the Muktinath Temple, or even on the serene lakes of Gosaikunda, these tours offer scenic views that can take several days or even weeks to explore. Nonetheless, Nepal has spectacular scenery that is accompanied by challenging issues regarding aviation. The tour operators will take care of the technical and legal requirements, but it is essential for you to know the basics for a smooth passage for you to enjoy either the majesty of Mount Everest or a religious pilgrimage to Muktinath. Licensed Operators and Safety Only the aviation companies that are officially licensed by the Civil Aviation Authority Of Nepal (CAAN) are allowed to operate helicopter flights. The rugged terrain and unpredictable weather of Nepal requires high aviation standards and all the helicopters must be operated by the companies that hold a valid Air Operator Certificate (AOC). Booking with an unlicensed operator is illegal and dangerous; therefore, you should always ensure that your flight is operated by a CAAN-approved company, such as Simrik Air, Air Dynasty, Heli Everest, or Manang Air. You must know about the pre-flight safety especially since landing zones are often at high altitudes, where winds and terrain can be unpredictable. You need to know how to enter and exit the helicopter safely and avoid the tail rotor blades. It is also important for you not to panic during emergencies, so that both you and the operators are safe. Limited Passenger Capacity per Helicopter The helicopters used in Nepal have a limited passenger capacity, with a maximum of 2-5 passengers per flight, excluding the pilot depending upon the flight. At high altitudes, the air density is low, which reduces the lift capacity. The operators strictly follow weight limits for safety, and you might be asked to provide your body weight in advance. Overloading the aircraft can cause serious risks, especially in mountainous areas like Everest, Langtang, or Dolpo so extra passengers may require a second flight. Weight and Baggage Restrictions Due to aircraft limitations, the passengers are allowed only a limited amount of baggage, usually between 5 to 10 kg per person. Flying at high altitudes, helicopters must have weight and baggage restrictions to operate safely including the passenger weight, equipment like cameras, jackets and emergency supplies on board. If you are carrying trekking gear or heavy camera equipment, you will need to inform the company in advance, and exceeding the weight limit may result in denied boarding or extra charges. Landings are Allowed only at Approved Helipads The helicopters in Nepal are not permitted to land anywhere and must use officially designated helipads. Nepal is a high altitude environment and is ecologically and culturally sensitive, therefore, the government restricts the helicopter landings to certified helipads like at Kala Patthar, Gokyo, and Annapurna Base Camp. You will need weather-verified zones where landings are safe and the permitted zones in national parks and restricted areas. It is illegal to land in unauthorized locations because it will endanger local communities or wildlife. Permit Requirements for Heli Tours Whether you are flying over or landing in conservation areas and national parks, permits are required. For the popular heli destinations like Everest Base Camp (EBC), Gosaikunda, and Annapurna Base Camp (ABC), you will need TIMS Card (Trekkers’ Information Management System) and National Park Permits like Annapurna Conservation Area Permit(ACAP) or Sagarmatha National Park (SNP). Without these permits, your helicopter flight can be denied takeoff or landing permissions by park authorities or CAAN. The tour operators will handle the paperwork hassle, but it is important for you to confirm whether it is included in your package or not. Emergency Evacuation Flights Incase of a medical emergency like altitude sickness, helicopters will evacuate you from high altitude regions but must be governed with insurance and medical necessity. The flights are not casual and require insurance approval or deposit with airspace clearance from aviation control. You will have to pay from USD 3000 to USD 6000+ based on the altitude itself therefore, it is recommended for you to have travel insurance that includes emergency helicopter rescue. Weather Dependent Flight Operations Helicopters in Nepal cannot operate in bad weather and are always under the Visual Flight Rules (VFR). Unlike planes with radar navigation, helicopters rely on clear skies to fly safely and may be delayed or cancelled due to fog, rain, or strong winds. The helicopter flights usually operate in the early morning from 6 to 9 AM, and night flights are not permitted. It is recommended for you to add buffer days in your itinerary in case your flight is missed or delayed. Cost Transparency and Cancellation Policies You must know about how the payments and refunds related to the helicopter flight. The average cost of a heli tour is USD 900-1200 per person for Everest Base Camp and USD 350-600 for shorter flights. It is important for you to clarify whether the flight cost is per person or per charter which can influence your planning especially travelling in groups. It is equally important for you to know the cancellation and refund policies. Due to weather conditions, the flights may be last-minute delayed or even cancelled and the reputable operators usually offer a full refund or rescheduling in case of weather related disruptions. Helicopter Tour Checklist for Travelers Before you take off, It is necessary to be fully equipped. Make sure you are prepared with this quick pre-flight checklist: Valid ID or Passport: It is required for permit processing and flight verification. Confirm Permits Are Included: You need to ensure your operator has arranged all necessary park or restricted area permits. Travel Insurance with Emergency Coverage: It is vital for high-altitude tours and potential evacuations. Wear Light, Warm Clothing: The temperatures drop sharply at high altitudes, even during short landings. Therefore, it is necessary for you to be warm and wear light clothing. Avoid Large Bags: The space is limited, so you should carry only essentials in a small daypack if needed. Share Your Accurate Body Weight: You need to share your accurate body weight, which will help operators balance the aircraft safely and avoid last-minute delays. Popular Heli Tour Destinations in Nepal Nepal offers some of the most magnificent helicopter tours in the whole world, allowing you to witness some of the most experienced destinations in the Himalayas within a few hours. The most common of all is the Everest Base Camp tour, which takes place over a duration of 4 to 5 hours, flying around the Khumbu Glacier and landing at Kala Patthar to enjoy the best views of Mount Everest. The other most popular option is the 2-hour Annapurna Base Camp helicopter tour, which includes spectacular views of the Annapurna range, usually accompanied by a short landing at the very base camp site. Other shorter but equally outrageous flights include the Gosaikunda heli tour, which takes about 1.5 hours and brings you to a sacred glacial lake nestled in the mountains, a significant pilgrimage site. On the same note, the Langtang Valley tour takes approximately 1.5 hours, which also provides close-up aerial views oclose-upng Lirung and other surrounding mountains. These attractions are perfect for those interested in the beauty of nature, experiencing local culture, and exploring the heights without time and physical constraints through trekking. Conclusion The ultimate experience in a helicopter flight in Nepal is flying over the breathtaking Everest region, landing at the holy lakes such as Gosaikunda Lake, or visiting sacred pilgrimage sites like Muktinath. Although the journeys are of short duration, they are very rich in scenic beauty, cultural significance, and adventure. Nevertheless, as flying to Nepal is not an easy task in its mountainous regions, it is essential to learn the rules, standards, and travel requirements. Book with us at Yeti Hikes and contact us today for the latest packages and safety updates. We will manage all logistics, including tour permits, safety briefings, and planning, so you can enjoy the flight. Hot on the Himalayan heights or spiritual heights, Yeti Hikes ensures that your air trip is unforgettable, as well as environmentally responsible!